
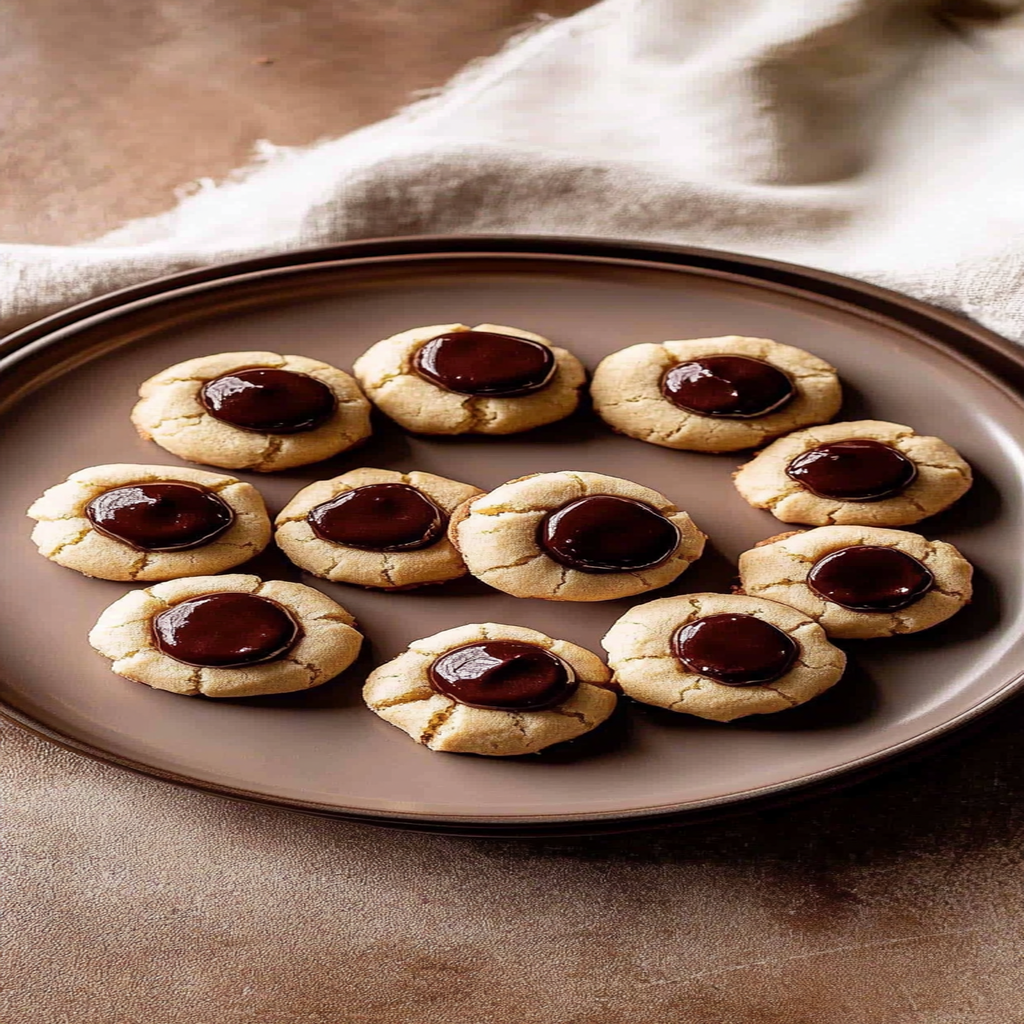
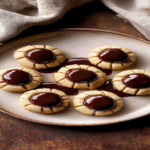
Chocolate thumbprint cookies are like little bites of happiness, waiting to be devoured. Imagine sinking your teeth into a soft, chewy cookie with a rich chocolate flavor that melts in your mouth. The sweet aroma wafts through the air, inviting everyone in the room to join the deliciousness. You can already feel the anticipation building for that perfect moment when you get to taste these delightful treats.
Now, let’s take a stroll down memory lane. Picture this: a cozy kitchen filled with friends and family, laughter ringing out as everyone eagerly awaits the first batch of cookies from the oven. That was my childhood, where chocolate thumbprint cookies became our go-to treat for any occasion. Whether it was a birthday party or just a rainy day, these cookies always brought joy and sweet memories. So grab your apron and get ready for an amazing flavor experience.
Why You'll Love This Recipe
- These chocolate thumbprint cookies are incredibly easy to whip up, making them perfect for any baking novice or pro.
- Each cookie bursts with rich chocolate flavor complemented by your choice of filling—it’s like a flavor explosion in every bite.
- Their beautiful appearance will make them the star of any dessert table or gathering.
- Plus, they’re versatile enough to enjoy anytime, whether it’s a holiday treat or an everyday snack.
Ingredients for Chocolate thumbprint cookies
Here’s what you’ll need to make this delicious dish:
- All-Purpose Flour: This is the foundation for your cookies; use good quality flour for the best results.
- Cocoa Powder: Unsweetened cocoa powder provides that rich chocolate flavor that makes these cookies irresistible.
- Granulated Sugar: Sweeten those cookies up! Use fine granulated sugar for even distribution throughout the dough.
- Butter: Softened butter adds moisture and richness; be sure it’s at room temperature before mixing.
- Egg Yolk: Just one egg yolk helps bind everything together while keeping the cookie moist.
- Vanilla Extract: A splash of vanilla enhances all those lovely flavors; opt for pure extract if possible.
- Salt: Just a pinch brings out all the flavors; don’t skip this crucial component!
For the Filling:
- Chocolate Chips or Jam: Choose your favorite filling—melted chocolate chips provide gooey goodness while jam adds fruity sweetness.
The full ingredients list, including measurements, is provided in the recipe card directly below.
How to Make Chocolate thumbprint cookies
Follow these simple steps to prepare this delicious dish:
Step 1: Preheat Your Oven
Preheat your oven to 350°F (175°C). Line two baking sheets with parchment paper so you can bake multiple batches without delay.
Step 2: Mix Dry Ingredients
In a bowl, whisk together flour, cocoa powder, and salt until well combined. This step ensures even distribution of dry ingredients throughout your dough.
Step 3: Cream Butter and Sugar
In another large bowl, cream together softened butter and granulated sugar until light and fluffy. This usually takes about three minutes—use an electric mixer if you want to save some elbow grease.
Step 4: Add Egg Yolk and Vanilla
Beat in one egg yolk and vanilla extract into your butter-sugar mixture until fully incorporated; it should look silky smooth.
Step 5: Combine Wet and Dry Ingredients
Gradually add your dry ingredient mixture to the wet ingredients until just combined; don’t overmix! You want that tender cookie texture.
Step 6: Form Cookies and Add Thumbprints
Scoop tablespoon-sized portions of dough onto your prepared baking sheets about two inches apart. Using your thumb (or back of a spoon), create an indentation in each cookie—this is where the magic filling will go!
Transfer them to preheated oven and bake for about 10-12 minutes until set but still soft in the center. Allow them to cool slightly before adding chocolate chips or jam into each thumbprint.
Transfer to plates and watch as they disappear faster than you can say “chocolate thumbprint cookies!”
You Must Know
- Chocolate thumbprint cookies are not just delicious; they are the edible version of a warm hug.
- These delightful treats are perfect for any occasion, making them a crowd-pleaser that everyone will love.
- Their rich chocolate flavor combined with sweet fillings creates a dreamy experience for your taste buds.
Perfecting the Cooking Process
To create perfect chocolate thumbprint cookies, start by mixing your dry ingredients separately before combining them with the wet ones. Chill the dough briefly to ensure it holds its shape when baking, and bake until edges are firm but centers remain soft.
Add Your Touch
Feel free to customize your chocolate thumbprint cookies! Swap out regular flour for almond flour for a nutty flavor or try different fillings like raspberry jam or peanut butter. Get creative – sprinkle sea salt on top or add nuts for extra crunch!
Storing & Reheating
Store your chocolate thumbprint cookies in an airtight container at room temperature for up to a week. If you want to keep them longer, freeze them in a single layer and then transfer to a freezer bag. Thaw before enjoying.
Chef's Helpful Tips
- To nail the perfect chocolate thumbprint cookies, always use room temperature butter for better mixing.
- Don’t overbake; aim for slightly underdone centers for that gooey texture.
- Finally, let the cookies cool completely before adding fillings to prevent melting.
Sometimes I whip up these cookies and end up sharing them at parties where they vanish faster than my hopes of being a professional chef. Friends can’t resist those little chocolatey wonders!
FAQs:
What are chocolate thumbprint cookies?
Chocolate thumbprint cookies are delightful treats featuring a rich chocolate base with a small indentation in the center. This unique shape allows for various fillings, such as jam, caramel, or ganache. These cookies are perfect for any occasion, whether it’s a holiday gathering or a simple afternoon snack. Their combination of flavors and textures makes them a favorite among chocolate lovers.
How do I store chocolate thumbprint cookies?
To keep your chocolate thumbprint cookies fresh, store them in an airtight container at room temperature. They can last for about a week without losing their delicious texture. If you want to extend their shelf life, consider freezing them. Simply layer the cookies between sheets of parchment paper in a freezer-safe container. Thaw them at room temperature before enjoying.
Can I customize the filling of chocolate thumbprint cookies?
Absolutely! One of the best things about chocolate thumbprint cookies is their versatility. You can use any filling you like, such as fruit preserves, peanut butter, or even Nutella. Experimenting with different flavors allows you to create unique variations that suit your taste preferences. Just ensure the filling complements the rich chocolate cookie base.
Are chocolate thumbprint cookies easy to make?
Yes, chocolate thumbprint cookies are quite easy to make, even for beginner bakers. The recipe typically involves simple ingredients like flour, cocoa powder, sugar, and butter. The process is straightforward: mix the dough, shape it into balls, create thumbprints, and bake! With minimal steps and common ingredients, these cookies are perfect for anyone looking to bake something delicious.
Conclusion for Chocolate thumbprint cookies:
In summary, chocolate thumbprint cookies are a delightful fusion of rich chocolate flavor and versatile fillings that everyone can enjoy. They are easy to make and require only basic ingredients found in most kitchens. Storing these treats properly ensures they stay fresh for days, while customization options allow you to tailor them to your taste. Whether shared at gatherings or enjoyed solo with coffee, these cookies promise satisfaction every time you take a bite.
Chocolate Thumbprint Cookies
- Prep Time: 15 minutes
- Cook Time: 12 minutes
- Total Time: 27 minutes
- Yield: Approximately 12 cookies 1x
- Category: Dessert
- Method: Baking
- Cuisine: American
Description
Chocolate thumbprint cookies are rich, chewy delights with a gooey filling that will satisfy every chocolate lover’s cravings. Perfect for sharing or indulging on your own.
Ingredients
- 1 cup all-purpose flour
- 1/3 cup unsweetened cocoa powder
- 1/2 cup granulated sugar
- 1/2 cup butter, softened
- 1 egg yolk
- 1 tsp vanilla extract
- 1/4 tsp salt
- 1/2 cup chocolate chips or jam (your choice)
Instructions
- Preheat Your Oven: Preheat oven to 350°F (175°C) and line two baking sheets with parchment paper.
- Mix Dry Ingredients: In a bowl, whisk together the flour, cocoa powder, and salt until combined.
- Cream Butter and Sugar: In a separate large bowl, cream the softened butter and granulated sugar until light and fluffy (about 3 minutes).
- Add Egg Yolk and Vanilla: Beat in the egg yolk and vanilla extract into the butter-sugar mixture until smooth.
- Combine Wet and Dry Ingredients: Gradually add the dry ingredients to the wet mixture until just combined; avoid overmixing.
- Form Cookies and Add Thumbprints: Scoop tablespoon-sized portions of dough onto prepared baking sheets, spacing them two inches apart. Create an indentation with your thumb in each cookie.
- Bake: Transfer to the preheated oven and bake for about 10-12 minutes until set but soft in the center. Allow cooling slightly before filling each thumbprint with chocolate chips or jam.
- Enjoy: Transfer to plates and serve once cooled!
Nutrition
- Serving Size: 1 cookie (approximately 20g)
- Calories: 100
- Sugar: 6g
- Sodium: 50mg
- Fat: 6g
- Saturated Fat: 4g
- Unsaturated Fat: 2g
- Trans Fat: 0g
- Carbohydrates: 10g
- Fiber: 1g
- Protein: 1g
- Cholesterol: 15mg
Keywords: - For a nutty flavor, substitute regular flour with almond flour. - Experiment with different fillings like fruit preserves or peanut butter for unique flavors. - Sprinkle sea salt on top for added contrast.

Leave a Comment