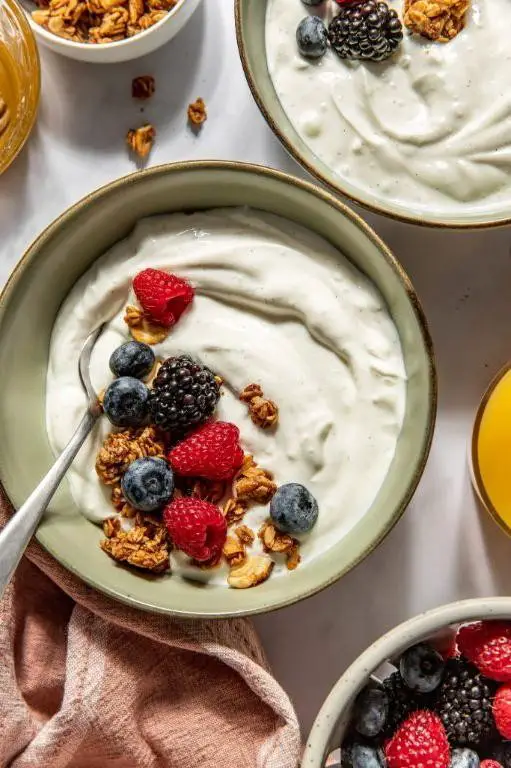
It’s a Sunday morning, and the sun spills golden light over my kitchen like warm honey. I can smell the tantalizing aroma of fresh yogurt wafting through the air. Yes, my friends, this is no ordinary yogurt; this is homemade instant pot yogurt—smooth, creamy, and downright delightful. Just picture it: a velvety swirl of yogurt topped with fresh fruit, granola crunch, and maybe a drizzle of honey if you’re feeling fancy. It’s an experience more than just breakfast; it’s a little bowl of happiness.
Now, let me take you back to that fateful day when I first conquered the art of making yogurt in my Instant Pot. I was armed with nothing but curiosity and an empty stomach. Little did I know that I was about to embark on a culinary adventure that would forever change my breakfast game. Whether it’s for a lazy brunch or a quick weekday snack, instant pot yogurt is versatile enough to be your new go-to recipe!
Why You'll Love This Recipe
- Making instant pot yogurt is incredibly easy and requires minimal effort.
- The flavor is rich and creamy, sure to impress anyone who tries it.
- Its beautiful texture makes it perfect for layering with fruits or granola.
- Plus, it’s versatile; you can enjoy it plain or add your favorite flavors!
Ingredients for instant pot yogurt
Here’s what you’ll need to make this delicious dish:
- Milk: Whole milk works best for creamy yogurt, but feel free to use 2% for a lighter version.
- Plain Yogurt Starter: Choose a high-quality plain yogurt containing live cultures for the best results.
The full ingredients list, including measurements, is provided in the recipe card directly below.
How to Make instant pot yogurt
Follow these simple steps to prepare this delicious dish:
Step 1: Prepare the Milk
Pour 1 gallon of milk into your Instant Pot’s inner pot. If you’ve got whole milk on hand, consider yourself lucky—the creaminess will blow your mind!
Step 2: Heat the Milk
Press the “Yogurt” button on your Instant Pot and select “Boil.” Allow the milk to heat until it reaches at least 180°F (82°C). This step helps create that luscious texture we all crave.
Step 3: Cool Down
Once the milk has boiled, remove the inner pot from the Instant Pot and let it cool down to about 110°F (43°C). You can use a thermometer or just dip your pinky finger in (but I don’t recommend that if you’re expecting guests).
Step 4: Add the Yogurt Starter
In a small bowl, mix about half a cup of plain yogurt with one cup of cooled milk until smooth. Then whisk this mixture back into the remaining milk in your Instant Pot.
Step 5: Incubate
Securely close the lid on your Instant Pot and press “Yogurt” again. Set it for at least 8 hours (or up to 12 hours if you like tangy yogurt). Go ahead and binge-watch your favorite series while you wait—it’ll be worth it!
Step 6: Chill Out
After incubation time is over, transfer your homemade yogurt into containers and refrigerate for at least two hours before enjoying. This helps set its texture even more.
Transfer to bowls and top with fresh fruits, nuts, or whatever tickles your fancy! Enjoy every creamy bite while basking in the glory of having made yogurt from scratch!
You Must Know
- This instant pot yogurt recipe not only delivers creamy, dreamy results but also simplifies your breakfast routine.
- It’s customizable with fruits or sweeteners, making it a delightful addition to your morning table.
- Plus, it’s a healthier alternative to store-bought options!
Perfecting the Cooking Process
To achieve the best yogurt consistency, start by heating the milk in your instant pot. Once it reaches 180°F, cool it down to about 110°F before adding the starter culture. Stir well and let it ferment for 8-12 hours for optimal tanginess.
Add Your Touch
Feel free to customize your yogurt by adding vanilla extract or honey during the cooling phase. You can also experiment with different types of milk, such as almond or coconut, to suit your dietary preferences and taste buds.
Storing & Reheating
Store your homemade yogurt in airtight containers in the fridge for up to two weeks. If you want to reheat it, do so gently in a microwave or on the stove while stirring to maintain its creamy texture.
Chef's Helpful Tips
- Always use fresh milk for the best flavor; avoid expired cartons.
- Make sure everything is sanitized to prevent unwanted bacteria from ruining your yogurt.
- Experiment with fermentation times until you find your ideal taste and texture!
The first time I made instant pot yogurt, my family thought I was some sort of culinary wizard. They were amazed at how easy and delicious it was—now it’s a staple in our home!
FAQs :
What is the best milk to use for instant pot yogurt?
When making instant pot yogurt, whole milk yields the creamiest and richest results. However, you can use low-fat or skim milk if you prefer a lighter option. It’s essential to choose pasteurized milk to ensure proper fermentation. Additionally, some people add a bit of powdered milk for extra creaminess. Experimenting with different types of milk can help you find your perfect flavor and texture.
How long does it take to make instant pot yogurt?
Making instant pot yogurt typically takes about 8 to 10 hours, depending on the desired tartness and thickness. After heating the milk and cooling it down, you add your starter culture. The fermentation process in the Instant Pot takes place during the Yogurt setting, so it’s a hands-off process once you start. Be patient, as longer fermentation times lead to tangier yogurt.
Can I flavor my instant pot yogurt?
Yes, you can absolutely flavor your instant pot yogurt! After the yogurt has finished fermenting and chilling in the refrigerator, you can stir in various flavors such as vanilla extract, honey, or fruit purees. For a healthier option, consider adding fresh fruits or nuts right before serving to enhance both taste and texture without excess sugar.
How do I store homemade instant pot yogurt?
Once your instant pot yogurt is ready and cooled, transfer it into airtight containers. Store it in the refrigerator for up to two weeks. Make sure to keep it sealed tightly to maintain freshness. If you have leftover whey from straining, you can use it in smoothies or baking for added nutrition.
Conclusion for instant pot yogurt :
In summary, making delicious instant pot yogurt is simple and rewarding. Choose your preferred type of milk and allow adequate fermentation time for optimal taste. You can experiment with flavors after preparing the base yogurt to suit your preferences. Storing homemade yogurt is easy; just keep it sealed in the refrigerator for freshness. Enjoy this healthy treat as a versatile ingredient or snack!

Homemade Instant Pot Yogurt
- Prep Time: 15 minutes
- Cook Time: 8 to 12 hours
- Total Time: 8 minute
- Yield: About 8 servings 1x
- Category: Breakfast
- Method: Instant Pot
- Cuisine: American
Description
Smooth, creamy, and easy to make, this yogurt is the perfect healthy breakfast or snack topped with your favorite fruits and nuts.
Ingredients
- 1 gallon whole milk (or 2% for a lighter version)
- 1/2 cup plain yogurt starter (with live cultures)
Instructions
- Prepare the Milk: Pour 1 gallon of milk into the inner pot of your Instant Pot.
- Heat the Milk: Press the “Yogurt” button and select “Boil.” Heat until the milk reaches at least 180°F (82°C).
- Cool Down: Remove the inner pot and let it cool to about 110°F (43°C).
- Add the Yogurt Starter: In a small bowl, mix 1/2 cup of plain yogurt with 1 cup of cooled milk until smooth. Whisk this mixture back into the remaining milk in the Instant Pot.
- Incubate: Close the lid securely and press “Yogurt” again. Set for at least 8 hours (up to 12 hours for tangier yogurt).
- Chill Out: After incubation, transfer your yogurt into containers and refrigerate for at least two hours before enjoying.
Nutrition
- Serving Size: 1 cup (245g)
- Calories: 150
- Sugar: 11g
- Sodium: 100mg
- Fat: 8g
- Saturated Fat: 5g
- Unsaturated Fat: 3g
- Trans Fat: 0g
- Carbohydrates: 12g
- Fiber: 0g
- Protein: 8g
- Cholesterol: 30mg
Keywords: Experiment with flavorings like vanilla extract or honey during cooling. Use almond or coconut milk for dairy-free options. Store in airtight containers in the fridge for up to two weeks.


Leave a Comment